To develop the custom mob app using Ionic, please visit our technology page.
Content Source:


Every production mobile app ultimately has a set of recurring tasks around integration, testing, deployment, and long term maintenance. These tasks often must be automated across a team of many developers and app projects. Building a process for these tasks can be incredibly time consuming and require specialized infrastructure experience, but is critical for the success of any serious app project.
Thankfully, teams don’t need to build solutions to these problems themselves, as there are services out there that can help. One such service works directly with your Cordova or Capacitor app to help your team easily perform these tasks. That means consistent builds, deploys on every commit, pushing remote app updates in realtime, and automating app store deployment as part of your mobile CI/CD workflow.

That service is Appflow, and it’s Ionic’s official Mobile DevOps platform. Appflow automates the whole DevOps side of your mobile app project, and is used to power significant apps and development teams across AAA, Burger King/Popeyes, Shipt, and more.
Let’s explore what a Mobile DevOps platform like Appflow is, what Appflow offers, how it differs from traditional CI/CD platforms, and how it’s being used today.
Appflow is known as a Mobile DevOps platform.
Mobile DevOps platforms, of which Appflow is one of the leaders, automate and simplify many continuous integration and delivery tasks, as well as other important mobile app deployment tasks. These platforms handle the heavy lifting so teams can focus on building their unique app, instead of reinventing the wheel.
Those tasks may include:
Beyond these tasks, DevOps is all about creating a culture of shipping often, involving stakeholders, and ensuring quality. All of which Mobile DevOps products can help your team embrace.
Appflow is the official Mobile DevOps platform built by the Ionic team, focused on bringing powerful Mobile DevOps workflows to hybrid app developers across Capacitor and Cordova whether or not they are using Ionic Framework.
Appflow, first and foremost, is a managed mobile build environment. That means it provides consistent and frequently updated iOS, Android, and web build environments. The Appflow team does the hard work of keeping mobile build tools and operating systems up to date and patched for security issues, whether that means updating to the latest versions of Xcode or the Android SDK, or new versions of macOS and Linux, and a whole lot more.
These builds are done in a highly secure environment, so teams can feel confident in offloading their mobile CI/CD process to Appflow, and on high performance hardware to make builds match the speed of development.
Appflow also manages authentic, legal Mac build hardware for fully automating iOS builds in the cloud, which also benefits developers on Windows machines that wish to build iOS apps but can’t or don’t want to buy Mac hardware.
On top of this environment, Appflow provides some pretty transformative features for hybrid app developers. Namely, the ability to remotely update an app without needing to re-submit to app stores (in a way that is App Store ToS friendly!), as well as publish app binaries directly to the Apple App Store and Google Play Store.
And Appflow can automate that whole process so it triggers on each commit, as well as enable powerful version splitting so testers, stakeholders, and customers can run on different versions of an app.
In the CI/CD space, there are generic build services like Circle CI or GitHub Actions, and there are specialized services like Appflow.
The biggest difference between the services is that Circle CI or GitHub Actions merely provide build servers, a way to trigger builds, and hooks for sending those builds elsewhere. They do not provide the tools or pipeline for mobile-specific builds, they do not handle the deployment of your app, and they certainly don’t manage build environments for you.
Here’s a visualization of the differences between the two approaches:

Pic courtesy: ionicframework.com
In theory, teams could build their own Appflow-style pipeline on another generic CI/CD platform like Circle CI or GitHub Actions, but that would require teams orchestrate and keep up to date a very complex chain of tools, operating systems, build environments, app store submission features, remote app deployment, and more. This is guaranteed to take a full team of engineers with a different skillset than the app dev team to build and manage, especially as new mobile and desktop operating systems are released each year.
It’s simply not feasible for the vast majority of teams to take this on in addition to building their apps.
This is why a specialized build service like Appflow stands out in the CI/CD and DevOps space. Beyond simply being a build service, Appflow is a managed mobile build environment that is fully managed by the mobile experts here at Ionic.
Generic CI/CD tools, with their focus on simply triggering builds, are not a direct replacement for Appflow. That means the two can easily be used alongside each other.
In this scenario, a team might have their generic CI/CD tool trigger builds and push code to Appflow, while Appflow manages the hard work of performing mobile builds on managed mobile development infrastructure, while also handling the last mile app update and app store publishing.
This works so well that around 68% of Appflow customers are using Appflow alongside a general purpose CI/CD tool, according to data from the 2020 Ionic Developer Survey.
This delivers the best of both worlds: You get to continue using your CI/CD tool of choice – or whatever your company has standardized on – while leaving the highly specialized, mobile specific build and publishing requirements to Appflow.
For more information and to develop mobile apps using Ionic, Hire Ionic Developer from us as we give you a high-quality product by utilizing all the latest tools and advanced technology. E-mail us any clock at – hello@hkinfosoft.com or Skype us: “hkinfosoft”. To develop Mobile Apps using Ionic, please visit our technology page.
Content Source:
Developers use Capacitor as a native app container for packaging and deploying their Ionic apps to various mobile and desktop platforms. The capacitor allows them to access native features like the Camera using the same code across all platforms – without having to worry about platform-specific details.

This new version updates Capacitor and its project templates to the latest security, bug fixes, and features including:
Traditionally, web developers have turned to tools like Apache Cordova/Adobe PhoneGap to deploy their web apps to other platforms. This worked well for many years, with Ionic recommending Cordova as the default method for targeting native iOS and Android platforms. Over time our opinions changed about how this layer should work and after exploring various ideas, determined the best option was to bring the native runtime component of app building in-house.
Now a key part of the Ionic Platform, Capacitor makes it easy for web developers to reuse their skills to build quality apps for all platforms, while significantly lessening the likelihood that they’ll get stuck on native-specific issues. You can learn more about how Capacitor compares with Cordova in this article penned by Max.
Capacitor 2.0 updates its underlying technology to support the latest versions of programming languages and operating systems that power all Capacitor apps, enabling improved performance, security, and modern development experiences. Specifically, support for the latest tech from iOS and Android is now available.
On the iOS front, this means Swift 5 and Xcode 11+ support. This brings smaller app bundle sizes, modern development tooling and features, and compatibility with earlier versions of Swift.
On Android, this means Android 10 (aka SDK 29), with improved security and biometrics, audio/video capabilities, and system-wide dark mode.
Additionally, AndroidX, the next generation of the Android Support Library, is now supported. Both provide Android developers with a standard way to provide users with newer features on earlier versions of Android or graceful fallback when unavailable.
AndroidX replaces the Support Library, providing feature parity and backward-compatibility while also bringing improvements to library modularity, smaller code size, and a better developer experience.
Whether you’re a consumer of Capacitor or a plugin author, you simply need to update your projects (or CLI) to access these new capabilities (see below).
Capacitor 1.0 wouldn’t have been as successful as it has been without a solid developer experience backing it. With Capacitor 2.0, we’ve reviewed it from head to toe, leading to updates to the core plugins, the CLI tooling, and documentation.
Fundamentally, if you’re going to build unique app experiences, you need a reliable set of plugins to build on top of. Capacitor 2.0 includes many updates to its 23 core plugins, from bug fixes to new features to usability improvements. Many of these changes were driven by feedback from you, the Ionic community, so thank you! We appreciate your efforts and feedback – it helps us ensure that it’s never been easier to get started with Capacitor.
Speaking of awesome community efforts, Ionic’s official tool for generating splash screens and icons, cordova-res, just got a big update: Capacitor support! Thanks to wanna dream for this contribution.
npm i -g cordova-res
cordova-res --skip-config --copy
Capacitor’s embrace of native tooling means that it’s never been easier to implement more creative native features. That said, the nuances and details can be challenging, so we’ve begun to add new implementation guides to the Capacitor docs, including Deep Links, Sign In with Apple, and a refreshed Push Notifications with Firebase guide. There are more coming soon – if there’s content you think is missing, please let us know in the comments.
In order to protect your user’s data, you need to keep up with the latest mobile security features. Security is traditionally challenging to implement correctly – with disastrous results if done wrong.
With the new support of AndroidX in Capacitor 2.0, Ionic Identity Vault now supports Android’s Face Unlock and Iris Unlock. This update to Ionic’s all-in-one frontend identity management system brings industry-leading facial and iris authentication features to the Android platform. Using a simple API, you can add top of the line biometric authentication to your Capacitor apps. Learn more here.
Capacitor 2.0 maintains near 100% backward compatibility with Cordova (available since the project originally launched). Not only does this ensure a smooth migration from Cordova to Capacitor, but it also provides access to thousands of existing native plugins. Learn how to use Cordova plugins here.
Capacitor gives Ionic developers complete control of their native projects. Among many other benefits, this makes updating easy and straightforward.
First, update Capacitor Core and the CLI:
cd your-app-folder
npm install @capacitor/cli@latest
npm install @capacitor/core@latest
Next, update each Capacitor library in use:
npm install @capacitor/ios@latest
npx cap sync ios

npm install @capacitor/android@latest
# Within Android Studio, click "Sync Project with Gradle Files" button

cd electron
npm install @capacitor/electron@latest
Then, follow these update instructions which cover one-time manual steps:
Capacitor 2.0 is a significant update to an increasingly important part of Ionic’s app development platform.
We’ve been blown away by the reception of Capacitor since it was announced, and installs have been growing quickly.
With 2.0, we are starting to make Capacitor the default for all new Ionic React and soon Ionic Angular projects, and expect us to be recommending Capacitor for all new Ionic apps and increasingly for enterprise apps as well.
Additionally, we are dedicating more internal resources to Capacitor as it becomes a key part of the Ionic offering. Expect to see Capacitor receive a lot more focus and attention from us in the coming months.
For more information and to develop mobile apps using Ionic, Hire Ionic Developer from us as we give you a high-quality product by utilizing all the latest tools and advanced technology. E-mail us any clock at – hello@hkinfosoft.com or Skype us: “hkinfosoft”. To develop Mobile Apps using Ionic, please visit our technology page.

First off, let’s go over what Capacitor is and how it relates to other cross platform projects out there.
At a glance, Capacitor follows many of the same ideas as Apache Cordova.

pic courtesy: blog.angular.io
There is a Web layer that renders the app and a native layer that listens for calls to Native APIs. Within those layers are many technical decisions that make the overall developer and user experience much smoother.
npm and modern JS tooling to simplify adding core plugins and creating new ones.These principles bring the best of web development and native development with little to no friction for developers.
Capacitor itself is made up of 2 packages, the core functionality (@capacitor/core) and the CLI (@capacitor/cli). To add Capacitor to your project, let’s start with a simple Angular App from the Angular CLI.
ng new capApp --routing --style css
cd capApp
With the app created, let’s add Capacitor to our project.
ng add @capacitor/angular
With this, developers can add Capacitor to their project with ease.

pic courtesy: blog.angular.io
When the schematic is done running, developers should build our app, and run npx cap add <ios,android> or yarn cap add <ios, android> and our Xcode or Android Studio projects will be created!
ng run capApp:build
npx cap add ios
First, it adds Capacitor dependencies to the package.json: Core and CLI.
This will just do a quick npm (or yarn) install then make sure we have the Core and CLI packages for Capacitor.
To make sure that the Capacitor project understands your Angular project, the schematic infers a lot of data based on your angular.json. It will read your app’s name and use that when creating the iOS and Android projects, as well as read the build folder so it knows where to copy your web code when preparing the native projects. This means that your Capacitor project will feel like a natural extension of your Angular project.
Once added, we do a build of our app, and deploy to either iOS, Android, web, or Electron. For building to iOS or Android, you’ll need to have the native SDKs and tools installed.
For more Information and to build the website using Angular, Hire Angular Developer from us as we give you high-quality product by utilizing all the latest tools and advanced technology. E-mail us any clock at – hello@hkinfosoft.com or Skype us: “hkinfosoft“.
To develop the custom web app using Angular, please visit our technology page.
Source:

In our previous blog post we learned basics about Ionic React app. Next, in this post let’s take a tour of what a stock Ionic React app consists of.
Open up the project in your favorite code editor and leave the ionic serve command running. Any changes we make will automatically be recompiled and refresh the app in the browser.

An Ionic React project is just a React project, with the setup you would normally find from a CRA app. One difference you might notice is that we use TypeScript.
We are big fans of TypeScript at Ionic, and we believe TypeScript in React provides a great, productive experience. However, if you want to use plain JavaScript, rename the files to use a .js extension and remove any of the type annotations from within the file, and your Ionic React app will now be a JavaScript app!
The src folder contains all the code for the app. The main entry point is the App.tsx file. Let’s break down what’s happening in this file.
At the top, we have the typical React and React Router imports, and then a series of imports from @ionic/react. Each of our Ionic components is exported as its own individual React component. In essence, Ionic React is a wrapper around the web components we have in the Ionic Core project but exported in a way that makes them feel native to a React developer. Any updates and enhancements we make to Ionic Core will automatically be available in Ionic React.
Next, we import a series of core CSS files. After those, there is also a variables.css file, which you can use to customize the theme of your app. For more info on theming your app, check out our doc on the subject.
Next, we have the main App component. Notice that in the starters, we are using 100% functional components. We are fans of this approach, but if you prefer class-based components, those work great as well.

Pic courtesy:-ionic-react-app-code
Each Ionic app starts with the IonApp component, which is the base container, and helps set up the screen to work great on both mobile and desktop. Next, the IonReactRouter component is a wrapper around the React Router library’s BrowserRouter component. To do the native-like page transitions and to maintain the state of the pages as you browse through your app, we augment React Router with some additional functionality.
The bulk of our tabs starter is now in the IonTabs component. The IonRouterOutlet contains a series of Routes (from React Router) for each of the pages in the tab interface.
Next, the IonTabBar component contains the bottom tab bar with a button for each of the pages, which forward to the Tab1, Tab2, and Tab3 components in the src/pages folder. The Tab1 and Tab2 pages have good examples on how to use some common Ionic components, but the Tab3 page is relatively bare. Let’s change that.
We will set up our empty tab to be a page to show a list of employees, with some demo data being pulled from the UIFaces project.
First, let’s update the tab bar in App.tsx to show a new label and icon:
<IonTabButton tab="tab3" href="/tab3">
    <IonIcon icon={people} />
    <IonLabel>Employees</IonLabel>
</IonTabButton>
The people icon is imported from 'ionicons/icons'
Open up Tab3.tsx , and replace the contents of the file with:
<IonTabButton tab="tab3" href="/tab3">
    <IonIcon icon={people} />
    <IonLabel>Employees</IonLabel>
</IonTabButton>
The people icon is imported from 'ionicons/icons'
Open up Tab3.tsx , and replace the contents of the file with:
import { IonAvatar, IonContent, IonHeader, IonItem, IonLabel, IonList, IonPage, IonTitle, IonToolbar, useIonViewWillEnter } from '@ionic/react';
import React, { useState } from 'react';

interface Person {
  name: string;
  email: string;
  position: string;
  photo: string;
}

const Tab3Page: React.FC = () => {

  const [people, setPeople] = useState<Person[]>([]);

  useIonViewWillEnter(async () => {
    const result = await fetch('https://uifaces.co/api?limit=25', {
      headers: { 'x-API-KEY': '873771d7760b846d51d025ac5804ab' }
    });
    const data = await result.json();
    setPeople(data);
  });

  return (
    <IonPage>
      <IonHeader>
        <IonToolbar>
          <IonTitle>Employees</IonTitle>
        </IonToolbar>
      </IonHeader>
      <IonContent>
        <IonList>
          {people.map((person, idx) => <EmployeeItem key={idx} person={person} />)}
        </IonList>
      </IonContent>
    </IonPage>
  );
};

const EmployeeItem: React.FC<{ person: Person }> = ({ person }) => {
  return (
    <IonItem >
      <IonAvatar slot="start">
        <img src={person.photo} />
      </IonAvatar>
      <IonLabel>

<h2>{person.name}</h2>


{person.position}

      </IonLabel>
    </IonItem>
  );
}

export default Tab3Page;
First, we define a TypeScript interface for a Person, which will give us some type safety and code completion when using the employees a bit later on.
At the top, we import a couple of React hooks to use, the first is useState, which allows us to use state in our functional components, and the second is useIonViewWillEnter, which is a lifecycle method provided by Ionic that will fire each time the view comes into view.
We provide a function to the useIonViewWillEnter hook that will fire that will call into the UIFaces API (using the fetch API) and return a list of twenty-five people. When the fetch request finishes, we call setPeople to update the people state variable.
In the JSX, we have an ‘IonList’ component, which contains an EmployeeItem for each of the people. We separate out the EmployeeItem into its own component (defined a bit farther down).
With the updates to Tab3, we can now get a list of employees:

pic courtesy: ionicframework.com
That is the basics on getting up and running with an Ionic React app!
For more Information and to build the app using Ionic, Hire Ionic Developer from us as we give you a high-quality product by utilizing all the latest tools and advanced technology. E-mail us any clock at – hello@hkinfosoft.com or Skype us: “hkinfosoft“.
To develop the Hybrid mobile app using Ionic, please visit our technology page.
Source:

Ionic React is a native React version of Ionic Framework that makes it easy to build apps for iOS, Android, Desktop, and the web as a Progressive Web App. All with one code base, standard React development patterns, and using the standard react-dom library and huge ecosystem around the web platform.
Ionic React represents the most significant change in Ionic Framework’s history and opens up Ionic Framework to a whole new audience.
For those that have been following Ionic since the early days, it might be a surprise to hear that we now support more than just Angular, and React of all things!
When we started Ionic Framework, the mission was to empower web developers to build top-quality apps using their existing web development skills, focused on the massive ecosystem around the web platform and web technology.
You might be wondering why we’d build Ionic React when React already has a great mobile option with React Native.
However, when we took a step back, we realized that Ionic React brought something pretty unique to the React ecosystem, and had a very different vision for what the future of app development might look like.
Instead of building an abstraction on top of iOS and Android native UI controls, we wanted to build something that was DOM-native, that would use the standard react-dom library and all the libraries that supported it out of the box, and the decades of existing work around the browser. When we looked at installs for react-dom compared to react-native, it was clear to us that vastly more React development was happening in the browser and on top of the DOM than on top of the native iOS or Android UI systems (16x more, in fact!). That further confirmed our belief that “web devs wanna web dev” and take advantage of their experience and existing library of functionality they’ve built on the DOM.
On top of that, developers are increasingly interested in Progressive Web Apps, especially in the enterprise. PWAs are, at best, an afterthought in the React Native ecosystem (and actually, not officially supported). In contrast, Ionic Framework is one of the leading PWA solutions and has some of the best performance for PWAs in the entire web ecosystem, thanks in part to our work on our Stencil project which we use to generate highly efficient components under the hood.
While Ionic still supports Cordova, new Ionic apps run on an all-new cross-platform engine called Capacitor that we built in-house. Capacitor takes modern JS and browser features, and makes it possible to deploy one app across iOS, Android, Electron, and the web as a Progressive Web App.
In fact, Progressive Web App support was a major goal of Capacitor, and many Capacitor APIs have powerful PWA support, such as Camera which has a custom UI experience available for adding native-quality camera features to your PWA.
While it is inspired by Cordova, in practice the development experience is very different. Capacitor is available as a modern JS API you can import directly into your app, with easy-to-use APIs for everything from File management to Geolocation to app-to-app sharing, to Push and Local Notifications. And exposing new Native SDKs to Capacitor is incredibly easy, requiring just a bit of wrapper code with first-class support for Swift on iOS (Java on Android).
Note: The first official version of Ionic React is v4.11.
Getting started with Ionic React is easy. First, if you haven’t already done so, install the latest Ionic CLI:
npm i -g ionic
Already have a React app? Adding Ionic React is easy.
Then, create a new project:
ionic start my-react-app
The CLI will guide you through the setup process by first asking a couple of questions. The first of which is what framework you would like to use, select React

pic courtesy: ionicframework.com
Next, the CLI will ask which starter template you would like to use.

pic courtesy: ionicframework.com
The CLI will now create your app and install all the dependencies. Once it is done, go into the directory and launch the app:
ionic serve
Under the covers, the ionic serve command uses the Create React App (CRA) project to compile your app, start a dev server, and open your app in a new browser window.
Once done, you will see your starter app up and running:

pic courtesy: ionicframework.com
In our next blog, We will take a tour of what a stock Ionic React app consists of.
For more Information and to build the app using Ionic, Hire Ionic Developer from us as we give you a high-quality product by utilizing all the latest tools and advanced technology. E-mail us any clock at – hello@hkinfosoft.com or Skype us: “hkinfosoft“.
To develop the Hybrid mobile app using Ionic, please visit our technology page.
Source:

The migration from Ionic 3 to Ionic 4 is the most significant in the frameworks history, and it sets a course for Ionic that likely will not be deviated from for years to come.
 We suggest the following general process when migrating an existing application from Ionic 3 to 4:
blank startersrc/providers to src/app/services
{ providedIn: 'root' } in the @Injectable() decorator.src/components to src/app/components, etc.src/app/app.scss to src/global.scssstyleUrls option of the @Component decoratorIn many cases, using the Ionic CLI to generate a new object and then copying the code also works very well. For example: ionic g service weather will create a shell Weather service and test. The code can then be copied from the older project with minor modifications as needed. This helps to ensure proper structure is followed. This also generates shells for unit tests.
In Ionic 4, the package name is @ionic/angular. Uninstall Ionic 3 and install Ionic 4 using the new package name:
    $ npm uninstall ionic-angular
    $ npm install @ionic/angular
While migrating an app, update the imports from ionic-angular to @ionic/angular.
One of the major changes between an Ionic 3 app and an Ionic 4 app is the overall project layout and structure. In v3, Ionic apps had a custom convention for how an app should be setup and what that folder structure should look like. In v4, this has been changed to follow the recommended setup of each supported framework.
For example, if an app is using Angular, that project structure will be exactly what an Angular CLI app would be. This change, while not too difficult to accommodate, helps to keep common patterns and documentation consistent.
The above comparison is an example of a v4 app’s project structure. For developers with experience in a vanilla Angular project, this should feel really familiar.
There is a src/ directory that acts as the home for the app. This includes the index.html, any assets, environment configuration, and any app specific config files.
While migrating an app to take advantage of this new layout, it is suggested that a new project “base” is made with the CLI. Then, with the new project layout, migrate the features of the app piece by piece. Pages/components/etc. should be moved into the src/app/ folder.
Ensure your Ionic configuration file has the appropriate type. The project type for v3 is ionic-angular. The project type for v4 is angular. If this value is incorrect, the CLI may invoke the incorrect build scripts.
See the following ionic.config.json as an example:
{
  "name": "my-app",
  "type": "angular"
}
Between V3 and V4, RxJS was updated to version 6. This changes many of the import paths of operators and core RxJS functions. Please see the RxJS Migration Guide for details.
With V4, we’re now able to utilize the typical events provided by Angular. But for certain cases, you might want to have access to the events fired when a component has finished animating during it’s route change. In this case, the ionViewWillEnter, ionViewDidEnter, ionViewWillLeave, and ionViewDidLeave have been ported over from V3. Use these events to coordinate actions with Ionic’s own animations system.
Older events like ionViewDidLoad, ionViewCanLeave, and ionViewCanEnter have been removed, and the proper Angular alternatives should be used.
In prior versions of Ionic, overlay components such as Loading, Toast, or Alert were created synchronously. In Ionic v4, these components are all created asynchronously. As a result of this, the API is now promise-based.
// v3
showAlert() {
  const alert = this.alertCtrl.create({
    message: "Hello There",
    subHeader: "I'm a subheader"
  });

  alert.present();
}
In v4, promises are used:
showAlert() {
  this.alertCtrl.create({
    message: "Hello There",
    subHeader: "I'm a subheader"
  }).then(alert => alert.present());
}

// Or using async/await

async showAlert() {
  const alert = await this.alertCtrl.create({
    message: "Hello There",
    subHeader: "I'm a subheader"
  });

  await alert.present();
}
Since Navigation has changed, the mechanism for lazy loading has also changed in V4.
In v3, a typical lazy loading setup worked like this:
// home.page.ts
@IonicPage({
  segment: 'home'
})
@Component({ ... })
export class HomePage {}

// home.module.ts
@NgModule({
  declarations: [HomePage],
  imports: [IonicPageModule.forChild(HomePage)]
})
export class HomePageModule {}
However, in v4, lazy loading is done via the loadChildren method of the Angular router:
// home.module.ts
@NgModule({
  imports: [
    IonicModule,
    RouterModule.forChild([{ path: '', component: HomePage }])
  ],
  declarations: [HomePage]
})
export class HomePageModule {}

// app.module.ts
@NgModule({
  declarations: [AppComponent],
  imports: [
    BrowserModule,
    IonicModule.forRoot(),
    RouterModule.forRoot([
      { path: 'home', loadChildren: './pages/home/home.module#HomePageModule' },
      { path: '', redirectTo: 'home', pathMatch: 'full' }
    ])
  ],
  bootstrap: [AppComponent]
})
export class AppModule {}
Since v4 moved to Custom Elements, there’s been a significant change to the markup for each component. These changes have all been made to follow the Custom Elements spec, and have been documented in a dedicated file on Github.
To help with these markup changes, we’ve released a TSLint-based Migration Tool, which detects issues and can even fix some of them automatically.
For more Information and to build the app using Ionic, Hire Ionic Developer from us as we give you a high-quality product by utilizing all the latest tools and advanced technology. E-mail us any clock at – hello@hkinfosoft.com or Skype us: “hkinfosoft“.
To develop the Hybrid mobile app using Ionic, please visit our technology page.
Source:

After more than a year of work, the Ionic Framework team has released version 4. The new version offers us significant changes in performance, compatibility with multiple frameworks (not only with Angular as previous versions), new documentation and many other improvements that we will analyze in this article.
Surely you will have many doubts — and perhaps fear — about this version change. But the good news is that despite the great improvements offered by Ionic 4, migrating from Ionic 3 to Ionic 4 is super simple!

In this article, we want to explain the comparison between Ionic 4 and Ionic 3, as well as the novelties and new concepts of this new version. Let’s see practical examples of how to use the new Ionic CLI, and the new Router. Then at the end, we will guide you on how to migrate your applications from Ionic 3 to Ionic 4.
Ionic Framework 4 was completely rewritten to use the Web APIs and each component is packaged as a Web Component. This allows the framework to be projected into the future. To help create the Web Components, the team created a tool called Stencil.
Web components are a set of web APIs that allow you to create HTML tags that are reusable and encapsulated.
One way to explain the Web Components is to imagine them as reusable user interface widgets that are created using open web technologies. They are part of the browser, and therefore do not need external libraries.
With Web Components, you can create almost anything that can be done with HTML, CSS, and JavaScript. In this way, you can create a portable component that can be easily reused.
Web components make the browser the one who does more work and in this way, they provide important improvements in the performance and load times of modern applications.
The Web Components are based on the following specifications:
Since its inception, Ionic Framework was built using Angular. But now with the popularity and support of web components, this has changed.
One of the great changes of this new version of Ionic is that it is completely independent of the base framework (previously this place was occupied only by Angular).
Since the components of the Ionic Framework, such as <ion-button>, are now encapsulated as Web Components, it is no longer necessary to bind to a base framework. Web components work with any framework, in fact, if you prefer you can not use any Framework.
What the Ionic Framework team intends with this change is that Ionic is a UI Framework that can work with whatever technology the programmers choose. This opens the door to future applications that can be created in Vue or in React using the Ionic web components.
Ionic CLI on Ionic 4The CLI 4.0 has been totally improved both in the features it offers and in its speed and ease of use.
In order to use it, we must have the latest version of the CLI in our development environment. We can install it by running the following command:
npm install -g ionic @ latest
To use the latest version of the CLI we must have installed node 8.9 or higher.Visit https://nodejs.org/ to find instructions on how to update Node.js.
Once the new CLI is installed, we can now create our first application with ionic 4. Running the following command, the CLI will create a new application with the basic structure of Ionic 4:
ionic start appName blank --type = angular
appName is the name of your project
blank is the template that we choose to create the skeleton of the application
type = angular is the type of project
Then to test your application in the browser you can run the same command that we used before in Ionic 3.
ionic serve
This is the structure of our new Ionic 4 application generated with the CLI:

pics courtesy: medium.com
You are probably wondering how to migrate an existing application from Ionic 3 to one from Ionic 4. The Ionic Framework team has written super detailed documentation with the steps for migration.
The truth is that the migration process is quite simple and personally has not generated any problems.
You can also use the migration linter which is a tool that automatically checks your code and tells you what changes you should make.
For more Information and to build the app using Ionic, Hire Ionic Developer from us as we give you a high-quality product by utilizing all the latest tools and advanced technology. E-mail us any clock at – hello@hkinfosoft.com or Skype us: “hkinfosoft“.
To develop the Hybrid mobile app using Ionic, please visit our technology page.
Source:

Ionic is a front-end SDK based over Angular, which is the most well-known JavaScript library. As a stage, it likewise encourages the integration of services for both, push notifications as well as analysis. As Ionic is a hybrid mobile application development platform, it has reduced the work for developers. Now developers have to invest less time in coding for more than one mobile platform. The Angular framework is dependent on JavaScript has obliged engineers with valuable tools and platforms to create versatile mobile-friendly applications. Using Angular advancement would now be able to make great quality and dynamic applications utilizing Ionic and Angular Framework.

Ionic shows changes in styling as indicated by the platform being used. It fits itself with the fringe and style of the mobile application platform, which makes the planning and growing part all the more fascinating and creative. Particularly required rules are trailed by Ionic appropriately with the platforms. The element display is well maintained and the device minutiae are followed. As per the gadget on which the application is running, the UI design will change based on different OS System. This is a remarkable element conveyed by ionic.
Ionic introduces a whole library of enhanced HTML, JS, and CSS instruments as it is based upon Angular and Sass. A great deal of coding and creating forms is disposed of because of the stunning and exceptionally helpful advantage that coders get through Ionic. For big business applications, particularly in organizations with the BYOD arrangements, the hybrid platform usage is a logical alternative.
The cross-platform application causes you to make a bigger market base and give you more noteworthy access to clients. Ionic consolidates Angular, HTML5+CSS and utilizes Cordova to get to native device functions. It offers incredible help and broad potential outcomes with highlights that are normally coordinated as local applications on a common base code.
Icons and splash screen creation are exceptionally tedious and repetitive undertakings to perform. The Icons and splash screen should be made independently as per the gadgets being used in regular coding practice. This takes heaps of vitality and time as the designers need to consider numerous parameters like height, width, host, type of device, and density while creating it. Ionic has made this assignment simpler for coders, as they require not to make different Icons and splash screen for every gadget. On Ionic, it just takes to create two files – .psd, .ai or .png within the resources directory, specify the template and it is done.
Hybrid applications are generally not renowned for their performance. But, Ionic has improved UI parts with embedded Crosswalk in the CLI to guarantee ideal execution crosswise over stages. Ionic stage with its JavaScript base gives more noteworthy access to portable designers to different stages with no execution compromise. At last, mobile application engineers can build complex applications by utilizing a hybrid mobile application development platform.
For more Information and to build the website using Angular, Hire Angular Developer from us as we give you a high-quality product by utilizing all the latest tools and advanced technology. E-mail us any clock at – hello@hkinfosoft.com or Skype us: “hkinfosoft“.
To develop the Hybrid mobile app using Ionic, please visit our technology page.

An interface is a programming feature that helps to define the expected structure of an object allowing that to serve as a contract of sorts for the class where it is implemented.

That helps explain the concept but how does this actually translate into working with real world code?
Let’s say for example we have the following method:
public requestSpecificArea(lat : number, lng : number) : Observable
{
  return this.http.get(this._api + `locate-neighbourhood?q=${lat},${lng}`);
}
As you can gather from the code we’re using Angular’s HttpClient class to query a remote API which returns data as an observable that we can subsequently subscribe to.
The data that is returned will be structured as follows:
{
  "description": [
    {
      "id":1,
      "region":"somewhere",
      "summary":"something"
    },
    {
      "id":2,
      "region":"somewhere else",
      "summary":"something else"
    }
  ]
}
Should be fairly straightforward and any expected data will be returned right?
Not necessarily.
If Angular doesn’t ‘understand’ the returned data then the HttpClient object will return back an error like the following:
Property 'description' does not exist on type Object
Pretty frustrating right?
This is where interfaces come to the rescue.
In the previous example Angular’s HttpClient class didn’t understand the shape of the returned object hence the error that was published to the console.
Using interfaces we can define the expected structure of such an object (i.e. the keys and their expected data types) like so:
export interface IRegion {
   description: Array;
}

export interface IRegionDescription {
   id: number;
   region: string;
   summary: string;
}
Here what we have done is very simple – created the following 2 interfaces (FYI: the generally accepted convention for naming interfaces is to prefix the name with a capitalised:
We begin with the IRegion interface which defines the expected data type for the description property within the returned data (which will be an Array type). Notice that we created a second interface named IRegionDescription to describe the structure of the data for that array? We then use this to help explain the structure for the property value within the IRegion interface.
By using interfaces we can describe the expected structure of our object be defining both their properties and their expected data types (I.e. string, number, boolean, array etc).
What if we encounter a situation where some of those properties might be present in some returned objects but not others?
In TypeScript these are referred to as optional properties and can be handled using the ? operator like so:
export interface IRegionDescription {
id?: number;
region?: string;
summary?: string;
}
Typically I define my interfaces in separate files and store these within their own interfaces sub-directory within the Ionic applications’ src directory. This allows me to separate my interfaces into one easily identifiable, central location making them easier to manage in the long run (it also keeps my code DRY – Don’t Repeat Yourself – which I appreciate as a developer striving for good practice).
Alternatively you might prefer to store your interfaces within your TypeScript files above the class where they will be used.
Either approach is fine and I’ll demonstrate both below.
Within my ionic-project/src/interfaces directory I create a TypeScript file named interface.region.ts which is structured as follows:
export interface IRegion {
   description: Array;
}

export interface IRegionDescription {
   id: number;
   region: string;
   summary: string;
}
This is then imported into the class where it needs to be used with the following import statement:
import { IRegion } from '../../interfaces/interface.region';
We then implement this interface using type assertion to instruct Angular’s HttpClient class on the expected data structure for the returned Observable:
public requestSpecificArea(lat : number, lng : number) : Observable
{
  return this.http.get(this._api + `locate-neighbourhood?q=${lat},${lng}`);
}
This then allows the data to be returned and parsed without throwing up any property not found errors.
If you prefer to define your interface within the class where it will be used simply do so as follows ABOVE the class definition like so:
export interface IRegion {
   description: Array;
}

export interface IRegionDescription {
   id: number;
   region: string;
   summary: string;
}

@Injectable()
export class YourPageComponentClassOrProvider {

}
For more information and to build Mobile app using Ionic, Hire Ionic Developer from us as we give you high quality product by utilizing all the latest tools and advanced technology. E-mail us any clock at – hello@hkinfosoft.com or Skype us: “hkinfosoft“.
To develop the custom mob app using Ionic, please visit our technology page.
Content Source:

When building an app, you’re always making sure that you are doing everything correctly from a technical perspective to ensure great performance. But another, often ignored part of performance is called perceived performance. Perceived performance is how fast an action appears to happen to the user.
Skeleton screens are a great way to improve the perceived performance of your app, when combined with traditional optimizations (lazy loading, code splitting, etc).
Let’s dive a little deeper into what skeleton screens are, why they are better than traditional loading spinners, and how Ionic makes it easy to use them!
You have probably seen skeleton screens before if you have used Facebook, Slack or Medium, but let’s go into detail about what they are. We can think of skeleton screens as rendering the “skeleton” or a “mockup” of content before it has actually loaded. For example, here’s what Medium does:

Pic courtesy: blog.ionicframework.com
As you can see, Medium is rendering some grey bars where content will be once it has loaded and also renders a grey box where the image will be once it has loaded.
Another good example is Facebook. They make heavy use of skeleton screens in their native app and web app. They use a similar implementation to Medium, rendering a Skeleton Screen where content will eventually be:

Pic courtesy: blog.ionicframework.com
As we mentioned above, skeleton screens can be better at increasing perceived performance than loading spinners, but why?
Let’s consider an app that only uses loading indicators and look at how it could benefit from using skeleton screens.
Loading Indicator
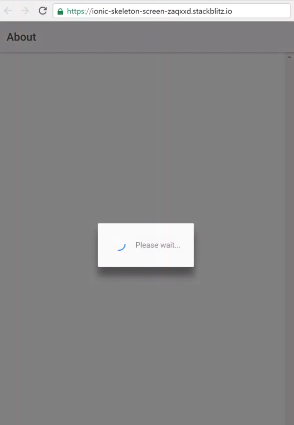
Pic courtesy: blog.ionicframework.com
Skeleton screen

Pic courtesy: blog.ionicframework.com
The page using a skeleton screen has several advantages here that lead to a better experience including:
Skeleton screens are pretty simple to make with plain HTML and a little CSS. Here is an example of a simple Skeleton Screen in Ionic-Angular.
In the above StackBlitz example, we hide the real list of users and display the skeleton list until the users have loaded using <code>*ngIf</code>. In our skeleton item we have the same DOM as our real item, an h2, h3 and p element.
<ion-list *ngIf="users">
<ion-item *ngFor="let user of users">
<h2>{{user.name}}</h2>
<h3>Email: {{user.email}}</h3>
<p>Company: {{user.company.name}}</p>
</ion-item>
</ion-list><ion-list *ngIf="!users">
<ion-item *ngFor="let fake of fakeUsers" class="fakeItem">
<h2></h2>
<h3></h3>
<p></p>
</ion-item>
</ion-list>
In our Sass we give each element a height, background color, opacity and a bit of margin. We then give each element a width based on the normal width of the element once the real users are loaded.
.fakeItem {
 h2, h3, p {
   background-color: lightgrey;
   opacity: 0.5;
   height: 1em;
   margin-top: 10px;
 }

 h2 {
   width: 35%;
 }

 h3 {
   width: 40%;
 }

 p {
   width: 60%;
 }
}
ion-skeleton-text componentWe are always searching for ways to make things easy and in 4.0 of Ionic, we have a new web component called ion-skeleton-text. This will make adding skeleton screens even easier!
<ion-item>
<ion-skeleton-text width="40px"></ion-skeleton-text>
</ion-item>
The width property here being used in the same way as our CSS width property in the previous example.
Skeleton screens can be a very powerful way to increase the perceived performance of your and make your app feel incredibly fast. When combined with traditional performance optimizations, skeleton screens can take your app to the next level of performance. As you can see skeleton screens are very easy to do in ionic-angular today, and with the next version of Ionic it will only get easier. Implement skeleton screens into your app today!
For more information and to build Mobile app using Ionic, Hire Ionic Developer from us as we give you high quality product by utilizing all the latest tools and advanced technology. E-mail us any clock at – hello@hkinfosoft.com or Skype us: “hkinfosoft“.
To develop the custom mob app using Ionic, please visit our technology page.
Content Source:


606, Suvas Scala,
Nr. Parikh Hospitals, S P Ring Road,
Nikol, Ahmedabad - 380049, Gujarat, India.
